I have never seen so much hatred towards a DSLR camera from people who have never used it as with this machine. Eccentric, flawed, slow, call it what you like… Sigma SD1 managed to gain a cult status of a misunderstood masterpiece of camera engineering able to reveal its secrets only to chosen ones – usually persistent and patient enough photographers with solid understanding of the basics of photography and experience with film photography.
Without a doubt during the time of its introduction SD1`s image quality was well ahead of its time. Similar to earlier DSLRs like Fujifilm Finepix S3/S5 and their proprietary Super CCD SR Pro sensor, Sigma`s RAW files contained so much information that its own software could not handle them quickly let alone Photoshop or Lightroom. The same conclusion was applicable to majority of Sigma`s lenses that could not match the Foveon X3`s resolution.
Sigma created this camera as a poor man`s medium format DSLR with resolution succeeding that of Nikon`s D800 and rivaling gear like Pentax 645D (33x44mm sensor & 40mp), Leica S2(30x45mm sensor & 37,5 mp), Hasselblad X1D (43,8×32,9mm & 50mp), Fuji GFX 50S (43,8×32.9mmsensor, 50,4 mp) all of which are not MF DSLRs since their sensor size is smaller than the 645 film format or 56×41.5mm. The best description of it could be “a portable weather sealed field camera with quick operation and excellent glass which still provides amazing bang for your bucks”!
Rugged compact body
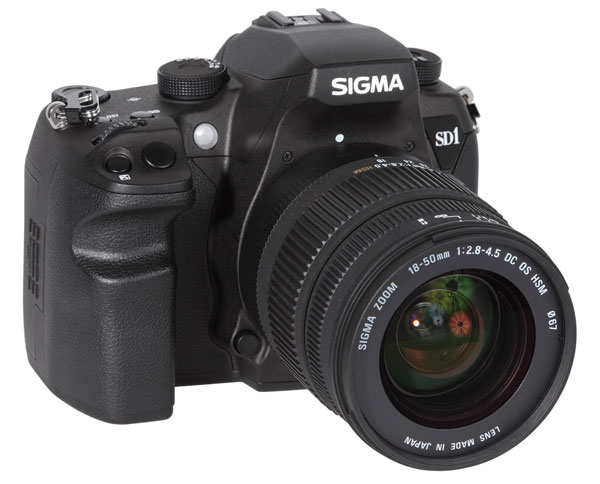
Sigma does not get any recognition for the design of this body. If the logo was at least Olympus it would have gathered lots of attention and appraisal for its compact size, weather resistance, weight (700g) and put in the same sentence with the slim OM SLRs of the film era. The compact chassis is covered with magnesium alloy housing that gives immediately a feel of a flagship model.
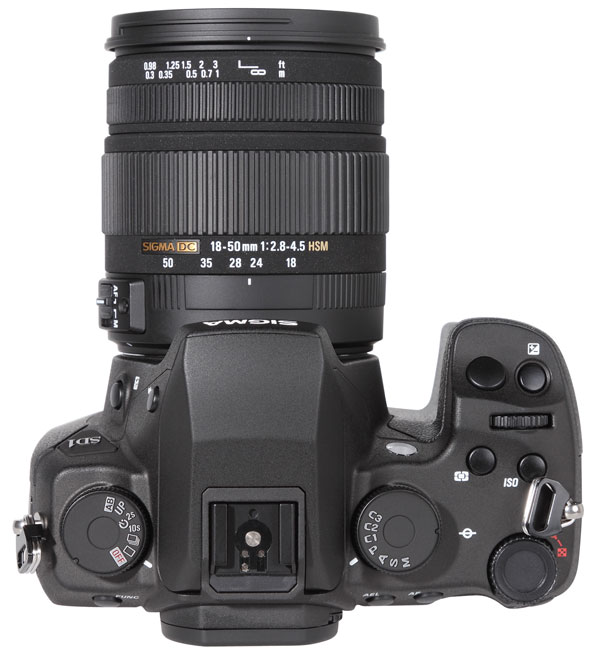
As you immediately have noticed the LCD on the top plate has been replaced with a PASM mode dial. The goal here is to make you spend more time looking trough the viewfinder while composing. The big LCD on the rear side will play the role of the digital data back many SLRs had in the past. With this in mind you can opt to view the shooting info in either the viewfinder or the back LCD. Unless you shoot all day long on tripod from ground or waist level, you will never miss it. Once you spend some time with the camera, you will feel natural to adjust settings in this manner.
The body has important functions cleverly positioned as external buttons. Most notably the exposure compensation button is located next to the shutter. The camera can be turned on from the dial to the left of the pentaprism that also serves as a switch among drive, mirror lock-up and bracketing mode. Less important features are accessible through the menu button on the back of the body.
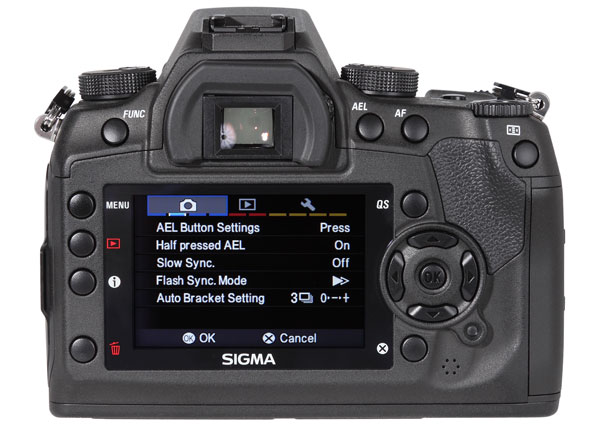
SD1 sports a large LCD with a good viewing angle for checking histograms and image previewing (exposure warnings). The resolution of 430 000 dots is typical for companies producing $20K plus cameras (e.g. Leica S2). Consumers are usually advertized quantity of specs instead of image quality so this is a drawback mostly for them… Even Canon D1s Mk III screen`s resolution is 230,000 RGB dots which comes to show that critical focus and sharpness are judged on a really good screen or a large print.
45mp Foveon Image Sensor
When you mention SD1 your first association must be huge prints and gallery exhibitions. As you might know the displays of mobile phones, tablets, laptops are not capable to show the vast color range of the Foveon sensor so we are limited when try to evaluate images digitally. Printing A3 plus size however will allow you to perceive more color depth and images clearly look more pleasing and naturally looking to the eye.
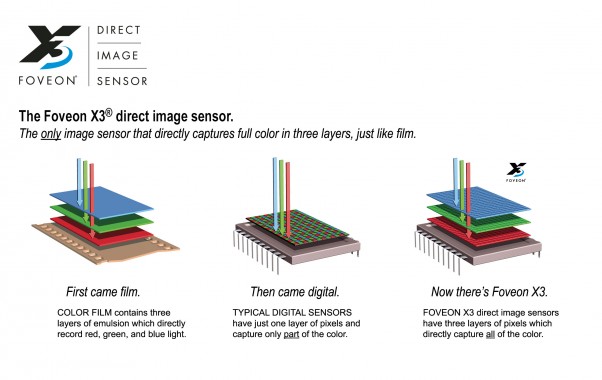
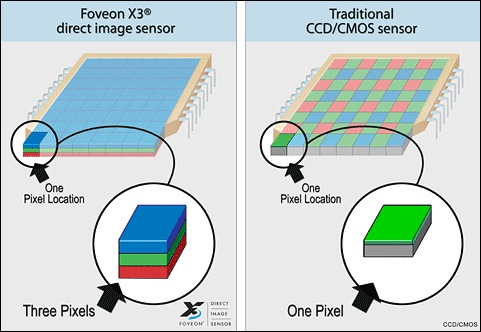
Beyer sensor technology is mature and does a pretty good job at guessing the exact color of each of its photo sites, resolves full detail for black and white objects but its resolution drops down to 1/4th when shooting red or blue objects and in between for green, orange and yellow color. As a result you get inconsistencies in sharpness which make your images look flat.
SD1`s Foveon sensor has 45 million photosites on 3 stacked plates (for each color) with 15 mp native resolution or 45mp Beyer matrix equivalent. No guessing of colors occurs on pixel level so you get true colors and exceptional detail, especially in objects of homogeneous color. Take off the AA filter and you get the holy grail for pixel peeping.
Finally to guaranty that 45mp resolution will have the expected detail Sigma has incorporated dedicated motors for the mirror and the shutter so camera vibration is fully eliminated. This feature is not new or exceptional but here it is better implemented than on other cameras since SD1 has more silent shutter and therefore less camera shake occurs when shooting. Landscape photographers will appreciate this when light is changing quickly and they wait for the best moment to trigger the shutter. Usually this happens after the self-timer runs its course (with the mirror locked up), which is not necessary the proper moment.
True colors and 3D look
The exceptional detail of SD1`s files makes it extremely suitable for landscape, product, macro, IR and B/W photography projects. Foliage, sky, rocks, red and yellow sun light take magical qualities with this sensor. The objects pop up with such a superb contrast that you almost feel you are there. Colors are saturated but retain realism and even look better than what you saw with your own eyes. Unlike in many other DSLRs here reds and greens take so many subtle nuances that make it difficult to want to go back to Bayer sensor after this experience.
Examples:
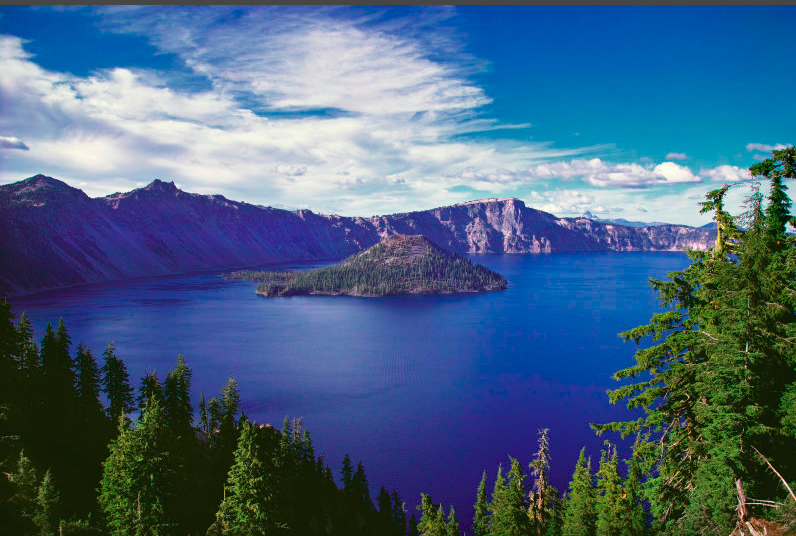
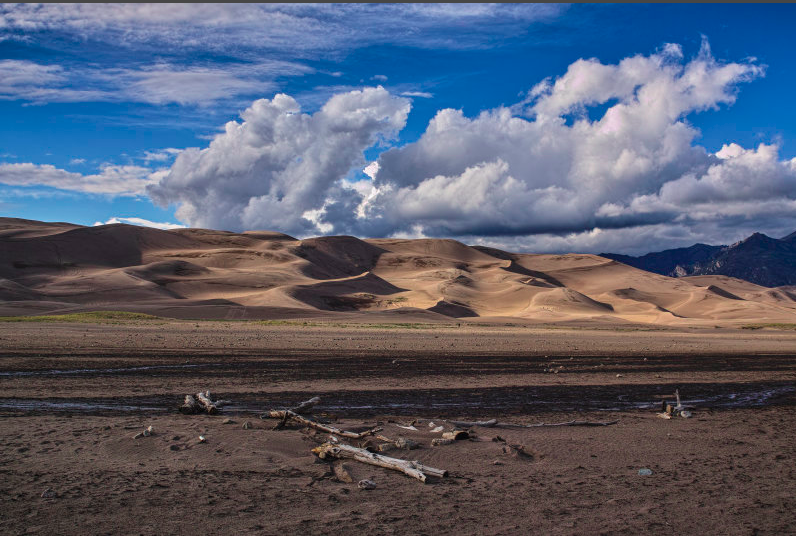
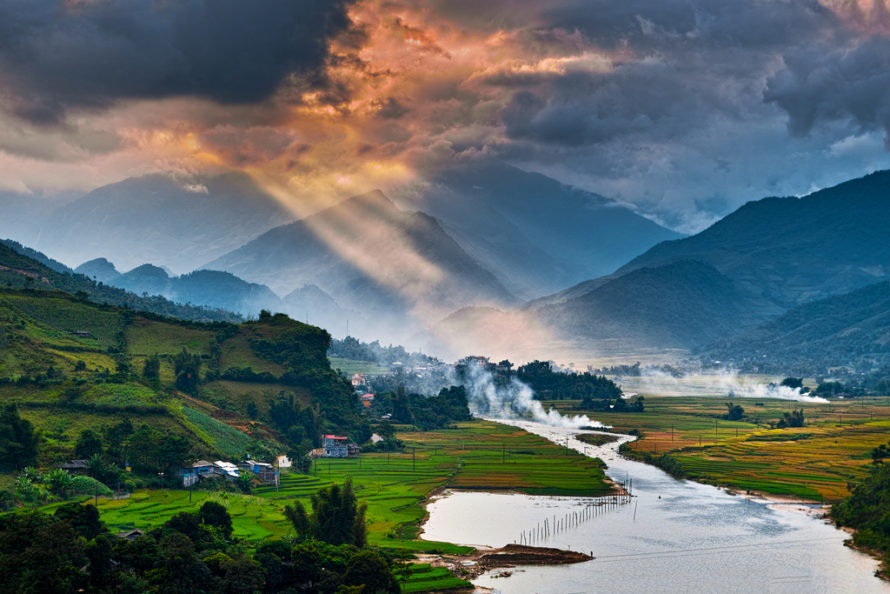
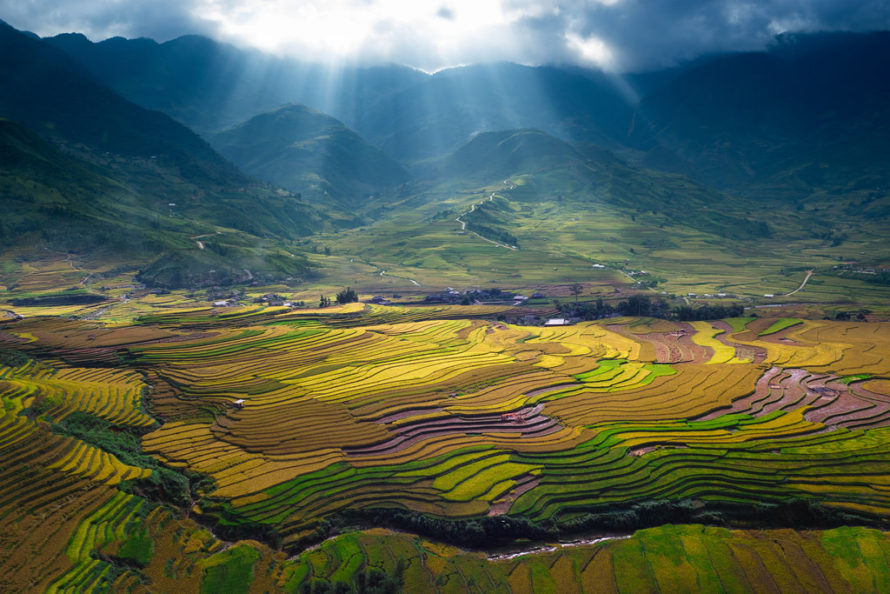
The separation between objects in focus (leaves edges or blades of grass) and background is so sharp and harsh that can hurt your eyes. Some SD1 owners believe that something is wrong with their sensor when in reality what they see is a dramatic improvement in the way clear color transitions are been rendered by the Foveon sensor. You must enlarge the images several times to get the true sense of “being there”.
Workflow as a digital “slide film” camera
Here is a list of recommendations on how to set the camera for best results:
– A just captured gigantic RAW image (45Mb in size) takes about 13 seconds to
review on your display! During this time no other image could be captured in
single shot mode!
– In continuous shooting mode you can have 4 fps with 0, 25 sec. interval.
– Conversion of a RAW file into 16-bit TIFF takes a minute.
You can open up the shadows with the excellent “Fill Light” slider
to get an impressive HDR-like result from a single image. If blown highlights warning
was present at the back screen when reviewing the shot you can gain back significant
detail in these areas. Additional editing (if needed) should be done with 3rd party
software.
If you are still not astounded by the quality of the images you get after reading all this than you must be doing something really wrong!
Bright Viewfinder
This will be one of the rare cases I will review a non-full frame DSLR. Having a large viewfinder is so essential to me that I would pass any camera for the lack of it. What made me break my rule? The mind-blowing detail and color reproduction of the Foveon sensor…
The viewfinder has the same field of view as Pentax and Sony and If marketing talk and numbers matter to you, comfort yourself you get a bigger viewfinder than Canon`s crop sensor cameras have (1,5 vs. 1,6 crop factor). Please see the image below for better idea of crop factors.
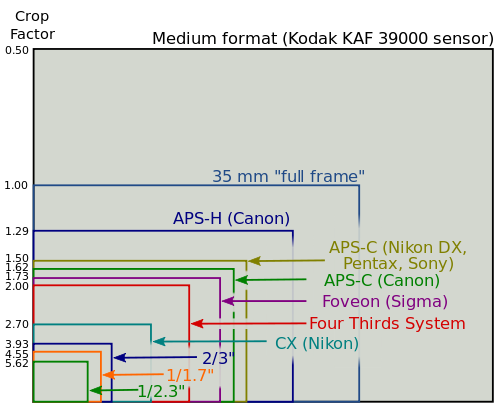
The viewfinder is very bright with 0.95x magnification (on par with Nikon D7000, Canon EOS 7D, and Pentax K-5) which makes it perfect for use in manual focus.
Just remember that should SD1`s AF hesitates chances are you are shooting in less favorable conditions for the Foveon sensor.
Accurate AF
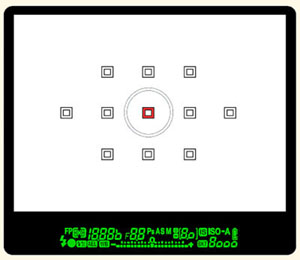
For a landscape camera designed to shoot static objects under good light, SD1 sports a quite reliable AF system of 11 twin-cross sensors. Most owners of SD1 shoot it by using only the central AF point and then recompose before fully hitting the shutter button. With an HSM or Art lenses AF is near the usual standard of speed set by Canon and Nikon. Compared to medium format DSLRs, SD1`s AF is noticeably quicker.
The camera remembers the distance to the last object you focused on and should the new object is near the 1st one focus speed is further increased. This is great if like to do a safety 2nd shot as many landscapers do. Objects of no contrast are easy to lock on without a problem.
Make sure you use the built-in micro AF adjustment function in the menu to avoid any IQ degradation when dealing with such a high-megapixel sensor.
Outstanding “Art” Lenses
Up until few years ago, due to the inconsistency of image quality from one lens sample to another Sigma was a synonym to a producer of cheap lenses for the masses. This changed with the introduction of the Art series lenses. They not only match but also improve upon the already excellent (and much pricier) Nikon and Canon premium glass.
That said, you must have a prime Art lens mounted at all times if you want that Foveon 3D look in your files. Older Sigma lenses reveal visible image deterioration towards the sides of the image and colors look cartoonish. If you stitch images for panoramas only Sigma`s art lenses provide the much needed corner to corner sharpness. You might need to zoom with your feet sometimes but primes` large aperture will help you have even brighter viewfinder and faster shutter speeds in low light situations.
Sigma zooms that can deliver reasonably sharp images (but still inferior to the art series lenses) are:
Recommendations for budget prime lenses:
If you are really adventurous and creative, you can dive into the world of SA lens adapters for 3rd party lenses. My recommendation will generally be to buy an SD1 body with already converted mount to accept the type of lenses you prefer (usually Nikon or Canon). There are many blog threads discussing how to make one but it is better to save time and energy for more rewarding do-it-yourself projects.
If you have Nikkor glass JTAT Nikon-SA adapter (second and newest version) is often cited as the best option for Nikon lenses but it is hard to find. You could also combine Roxsen Nikon lens to M42 mount camera adapter and M42-SA adapters.
If losing all auto functions hasn`t put you off so far then many photographers report having terrible greenish cast on their pictures with 3rd party glass which cannot be removed by adding lens profiles in software. The only lenses I came across online which do not have the reported color defects in the lens corners are:
Current offers for SIGMA SD1:
To be continued!
Links:
Sigma SD 14
